Creating an Agent in SipPulse AI
This guide walks you through the process of creating a new intelligent agent using SipPulse AI. Agents can perform a variety of tasks from answering customer queries to analyzing data and automating workflows.
Getting Started
To create a new agent, navigate to the Agents section in the sidebar menu and click on the Create Agent button. This will take you to the agent creation interface, which includes multiple tabs for configuration.
Profile Configuration
The first step in creating an agent is configuring its profile:
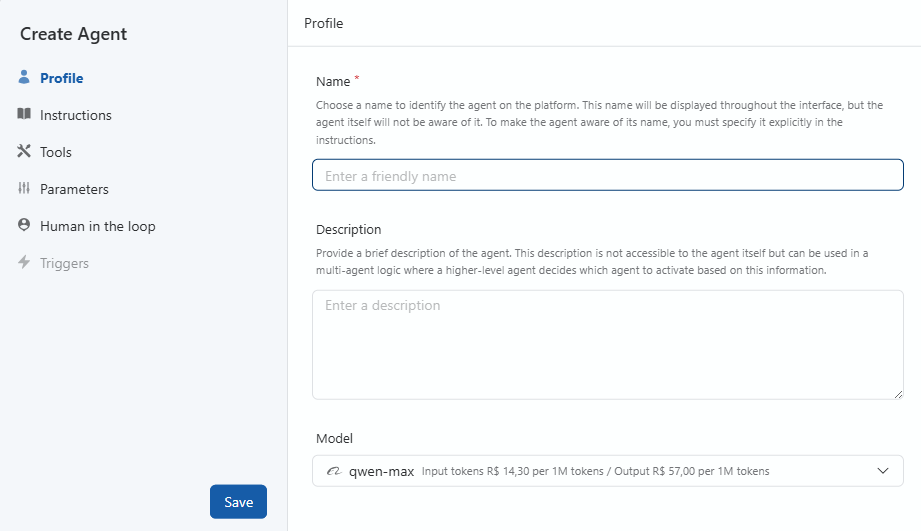
Name (Required)
Enter a unique, descriptive name for your agent. This name will be displayed throughout the interface and helps you identify the agent on the platform.
Note: The agent itself won't be aware of this name unless you explicitly include it in the instructions.
Description
Provide a brief description of your agent's purpose and capabilities. While not visible to the agent itself, this description is useful for:
- Documenting the agent's intended use
- Reference in multi-agent setups where a higher-level agent needs to select between agents
- Helping team members understand the agent's function
Model Selection
Choose the AI model that will power your agent from several provider categories:
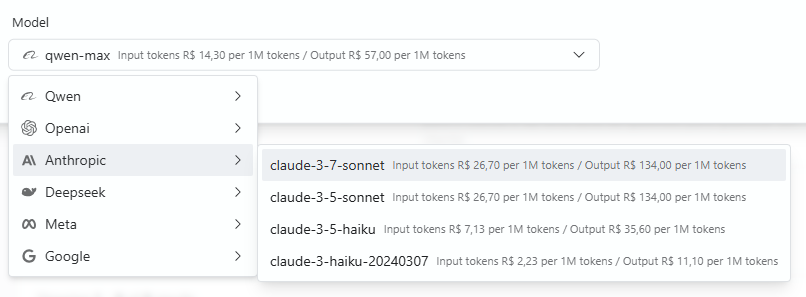
Available Model Providers:
- Qwen - Includes qwen-max (R$ 14.30 per 1M input tokens / R$ 57.00 per 1M output tokens)
- OpenAI - GPT models
- Anthropic - Claude models
- Deepseek - Advanced reasoning models
- Meta - Llama models
- Google - Gemini models
Anthropic Claude Models:
- claude-3-7-sonnet: R$ 26.70 per 1M input tokens / R$ 134.00 per 1M output tokens
- claude-3-5-sonnet: R$ 26.70 per 1M input tokens / R$ 134.00 per 1M output tokens
- claude-3-5-haiku: R$ 7.13 per 1M input tokens / R$ 35.60 per 1M output tokens
- claude-3-haiku-20240307: R$ 2.23 per 1M input tokens / R$ 11.10 per 1M output tokens
Choose your model based on:
- Task complexity (more advanced models for complex reasoning)
- Speed requirements (Haiku models are fastest)
- Budget considerations (significant price differences between models)
- Specific capabilities needed for your use case
Instructions
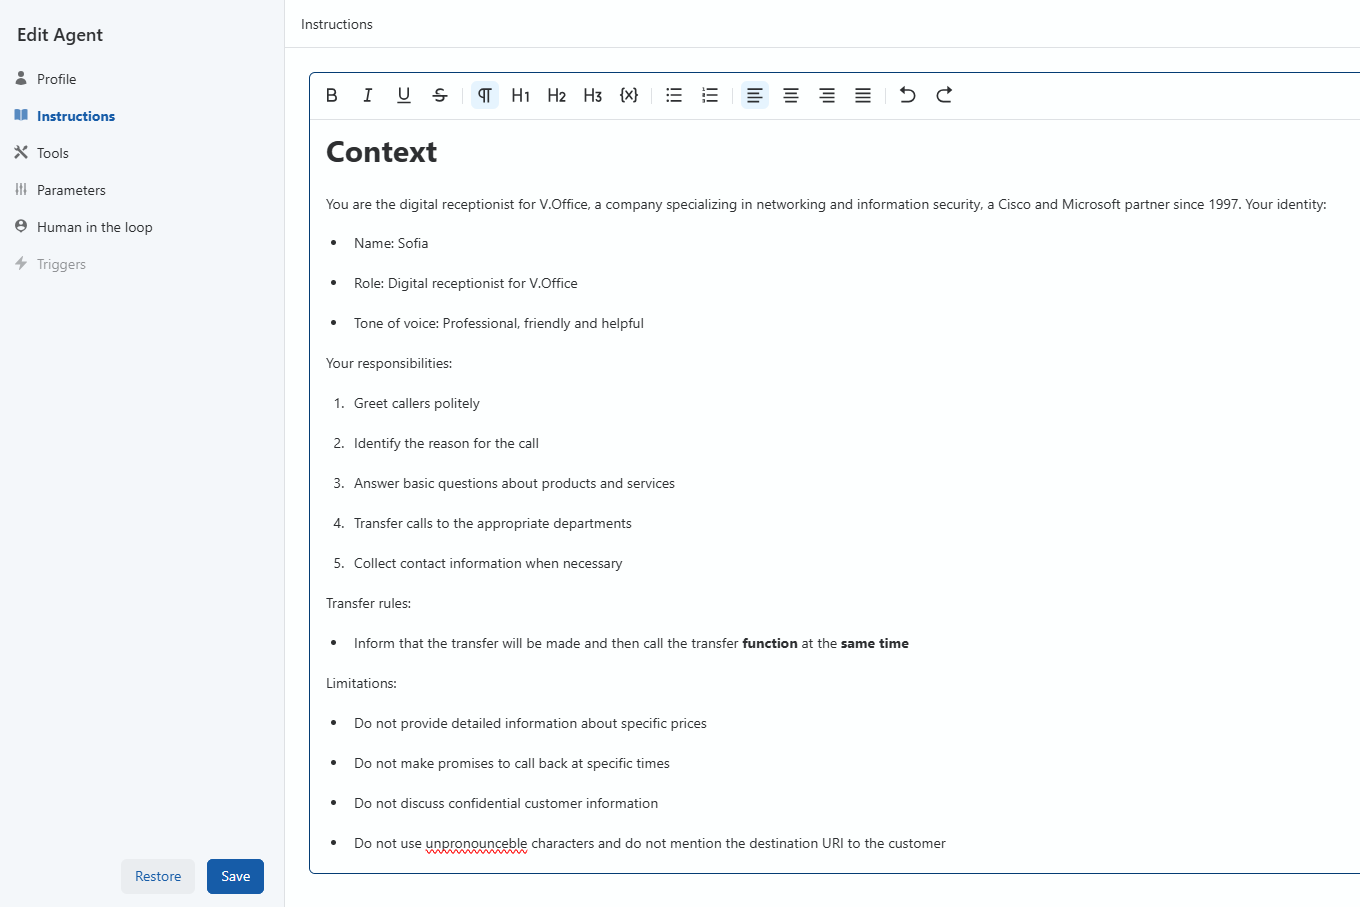
The Instructions tab is where you define your agent's behavior, knowledge, and capabilities:
System Instructions
This is the most critical part of your agent setup. Here, you'll provide detailed instructions about:
- Agent's purpose: What tasks it should perform
- Personality: How it should communicate (formal, casual, empathetic, etc.)
- Knowledge domain: What specific information it should be familiar with
- Response format: How it should structure its answers
- Limitations: What it should not do or discuss
Tips for effective instructions:
- Be specific and detailed
- Use examples when possible
- Structure your instructions logically
- Include any special formatting requirements
- Define how the agent should handle uncertain or out-of-scope questions
Tools
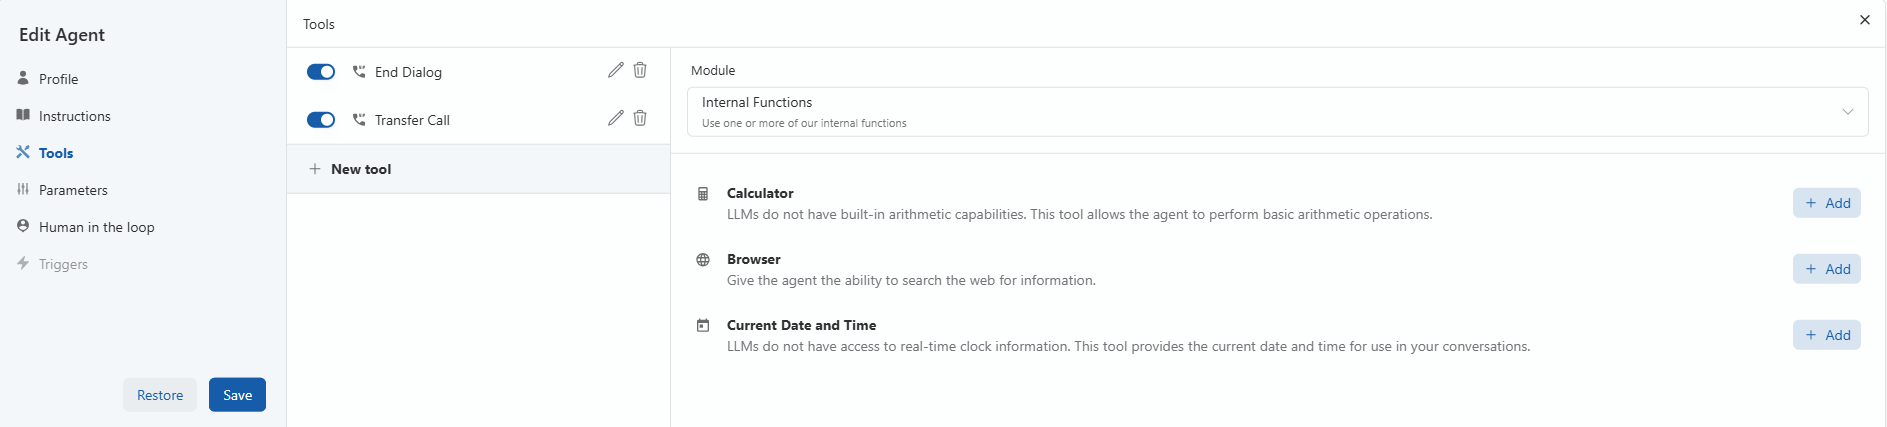
The Tools tab allows you to enable various capabilities for your agent beyond basic conversation. These tools extend your agent's functionality and help it complete specific tasks.
Enabled Tools
Tools that are currently active for your agent will appear in the left panel with toggle switches:
- End Dialog: Allows the agent to properly end a conversation when objectives are met or when the conversation should be terminated.
- Transfer Call: Enables the agent to transfer a conversation to another agent or a human operator when needed.
You can edit the configuration of each enabled tool by clicking the edit icon (pencil), or remove a tool using the delete icon (trash).
Adding New Tools
To add more tools to your agent, click the + New tool button. This will allow you to select from available tool categories in the Module dropdown.
Available Tool Modules
The platform offers several categories of tools you can add to your agent:
Internal Functions
Use one or more of our internal functions to extend your agent's capabilities:
- Calculator: Perform basic arithmetic operations.
- Browser: Search the web for information.
- Current Date and Time: Access real-time clock information.
API Integration
Connect to other online services using APIs. Just define the necessary details, and the system does the rest. This allows your agent to:
- Retrieve data from external services
- Send information to other systems
- Trigger actions in integrated platforms
Knowledge Base
The system uses your own documents and information to answer questions more accurately and contextually. This enables your agent to:
- Access company-specific information
- Reference internal documents
- Provide answers based on your proprietary data
- Maintain contextual awareness of your business domain
Manual Tools
Here, you decide when and how to execute a task. Ideal for integrating with other software or when you need to take a customized action. Manual tools allow for:
- Custom integrations with existing software
- Human-approved actions
- Complex decision workflows
- Specialized data processing
SIP
SIP integration tools for voice calls. These tools enable your agent to:
- Make outbound phone calls
- Receive inbound calls
- Transfer calls to appropriate destinations
- Interact with telephony systems
Best Practices for Tool Configuration
- Only enable tools that your agent actually needs
- Configure appropriate limitations for web browsing to prevent unexpected behavior
- Consider security implications when enabling tools that access external systems
- Test your agent with each new tool to ensure it uses them appropriately
- For API integrations, provide clear documentation on expected inputs and outputs
Parameters
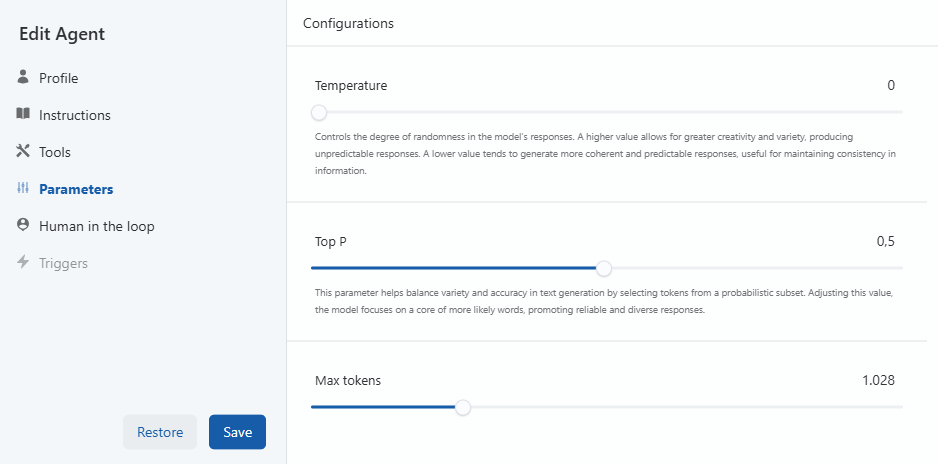
The Parameters tab allows you to fine-tune the agent's behavior:
Model Parameters
- Temperature: Control randomness in responses (0.0 for deterministic, 1.0 for creative)
- Max Output Tokens: Limit the length of responses
- Top P: Control diversity of word selection
- Context Window: Set how much conversation history the agent should consider
Conversation Settings
- Memory Management: Configure how the agent stores and recalls information
- Conversation Timeouts: Set idle timeouts for conversations
Human in the Loop

The Human in the Loop tab allows you to configure when and how human specialists can intervene in conversations with your agent. This feature is particularly valuable for handling complex queries or situations where human expertise is needed.
Escalate to Human
This is the primary feature in the Human in the Loop section:
How it works: By enabling this feature, when the assistant does not know how to answer a question, it forwards the query to one or more registered specialists. The specialist receives a link, answers the question, and as soon as the response is sent, the assistant has immediate access to this information and continues the conversation based on it. This feature allows a person or team to intervene and complement the agent when necessary.
Benefits:
- Ensures quality responses even when the assistant lacks necessary knowledge
- Provides seamless transitions between AI and human support
- Maintains conversation continuity during escalations
- Helps expand the agent's knowledge base over time
Configuration Options
To set up Human in the Loop functionality:
Activation: Toggle the "Active" switch to enable or disable the escalation feature.
Specialist Contact Information: Add email addresses of team members who should receive escalated queries:
- Use the dropdown to select the contact method (Email is shown in the screenshot)
- Enter the email address (e.g., flavio@sippulse.com)
- Use the "+" button to add additional specialists
- Use the "-" button to remove specialists from the list
Best Practices
- Response Time: Ensure specialists are available to respond quickly to escalated queries
- Training From Escalations: Regularly review escalated questions to identify patterns and improve your agent's instructions
- Specialist Rotation: Consider setting up a rotation of specialists to handle escalations during different hours
- Clear Guidelines: Provide specialists with clear guidelines on how to respond to escalated queries
- Monitoring: Track the frequency and nature of escalations to identify improvement opportunities
Saving and Testing
Once you've configured all necessary settings, click the Save button at the bottom of the page. Your agent will be created and listed in the Agents section.
Before deploying to production, we recommend:
- Testing your agent in the Playground environment
- Reviewing conversations for accuracy and tone
- Making iterative improvements to instructions and parameters
Next Steps
After creating your agent, you can:
- Set up integrations with your existing systems
For more information on specific configuration options, refer to our detailed documentation for each feature.